Click Here to Download Example Workout of this Article
Purpose of this Article:
I have read many online articles and seen many you tube videos to create the Simple Restful WCF service in an easiest / short hand way. Creating and configuring WCF service is pretty simple, if we clearly understand the steps. Before touching the code you should know why we need to use WCF Service and what is REST.
Here I’m going to explain the easiest way to create a Restful WCF Service which will returns the XML and Json responses over the http request.
Why do I need to use this?
Let’s say we have 2 clients and we need to implement a service for them.
The first client is using Java application and expecting message format to be in Json / XML format over the Http protocol.
The second client is using Desktop application and expecting message format to be in Binary format over the TCP protocol.
So satisfy the both client requirement we ended up the Web service and Remoting Services. Here we have single programming model that satisfies the both client requirement. WCF service is going to unify everything (Remoting Service, web service, Enterprise service).
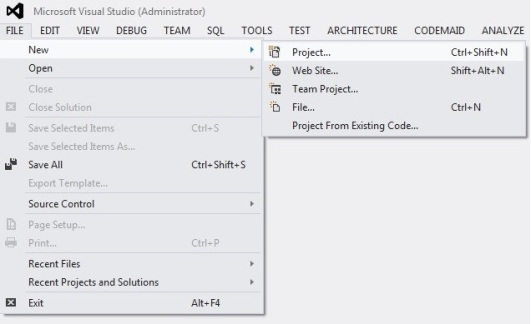
Open Visual studio and follow the below steps:
Step 1:
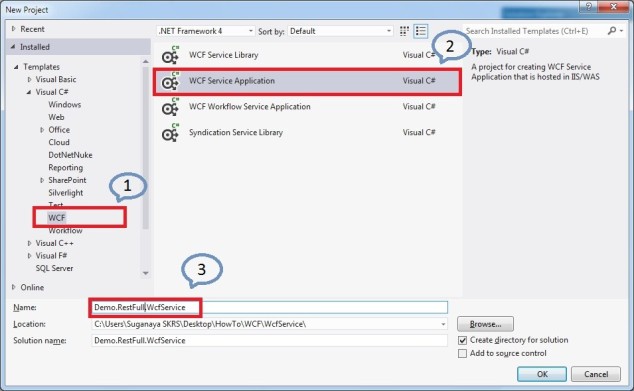
STEP 2:
- Click on the WCF service application.
- And Name your project and solution as RestFull.WcfService.
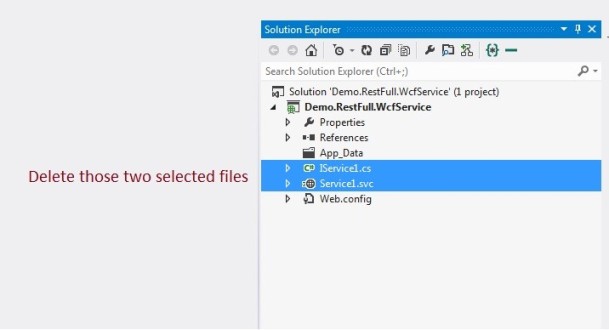
Step 3:
- Delete the default service files from the solution.
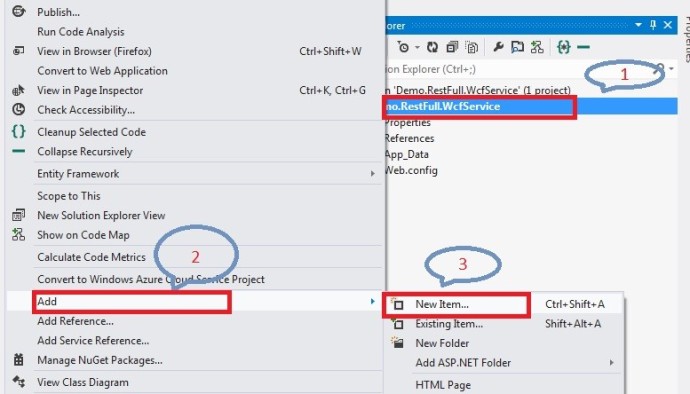
Step 4:
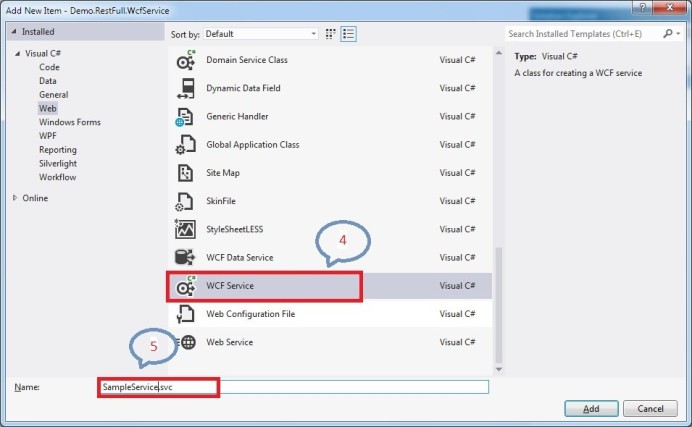
- Right click on the project name “Demo.RestFull.WcfService”.
- Go to “Add” option.
- And click on “New Item”.
- Select the Wcf Service.
And Name your service as “SampleService.svc”.
Step 5:
- Click on the ISampleService.
Add the below Methods.,
[ServiceContract]
public interface ISampleService
{
[OperationContract]
[WebInvoke(Method = “GET”, ResponseFormat = WebMessageFormat.Xml, UriTemplate = “Xml/{name}”)]
string SayHelloXml(string name);
[OperationContract]
[WebInvoke(Method = “GET”, ResponseFormat = WebMessageFormat.Json, UriTemplate = “Json/{name}”)]
string SayHelloJson(string name);
}
On top of your interface methods add the WebInvoke Setting code. Method Type, Response format and UriTemplate. So, totally your ISampleService interface should look like above. I have defined two methods, to demonstrate the differences.
Step 6:
- Click on the SampleService.
- Implement the interface ISampleService in to
- Refer the below code. Your SampleService should look like below.
public class SampleService : ISampleService
{
public string SayHelloXml(string name)
{
return “Hello ” + name + “. I’m XML method.”;
}
public string SayHelloJson(string name)
{
return “Hello ” + name + “. I’m Json method.”;
}
}
- Build your solution.
Step 7:
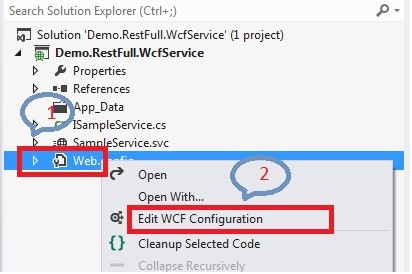
- Go to Solution explorer. And Right Click on the Web.Config.
- Click on the Edit WCF Configuration.
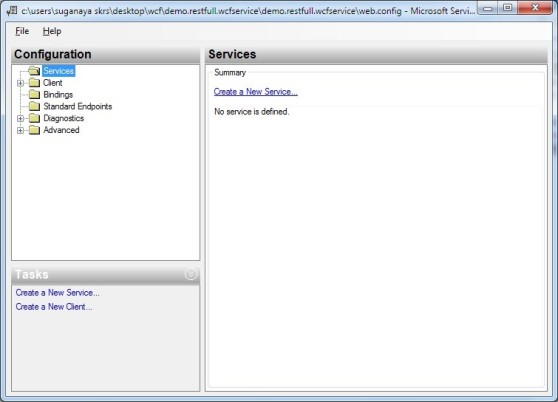
- You will get window opened Like below.
Step 8:
- Right click on the Services node.
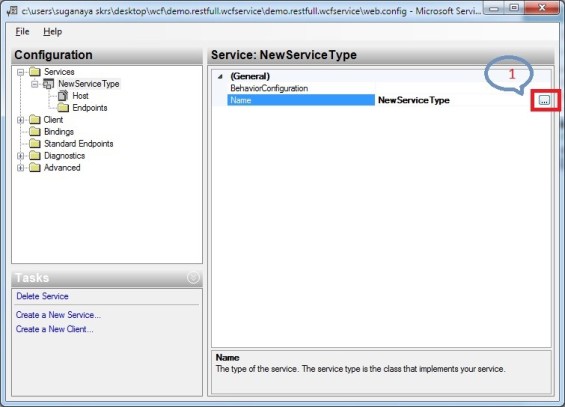
2. Click on the icon below highlighted.
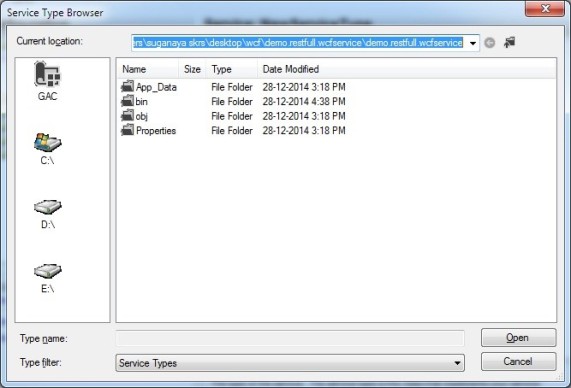
3. You will get the below window.
4. Click on the Bin Folder.
5. Inside Bin Folder. Click on the “RestFull.WcfService.dll”.
6. And select you service “RestFull.WcfService.SampleService”.
Step 9:
- Now Right click on the “EndPoint”.
- Click on “New Service EndPoint”.
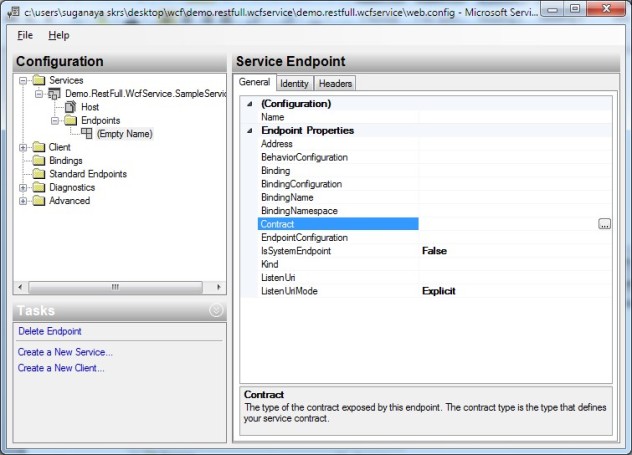
3. Look at the Service Endpoint View in window.
4. Click on the Contract Icon.
5. You will get new popup window opened. There you click on the bin
6. Select your wcf project dll “RestFull.WcfService.dll”.
7. Select your ISampleService inside.
Step 10:
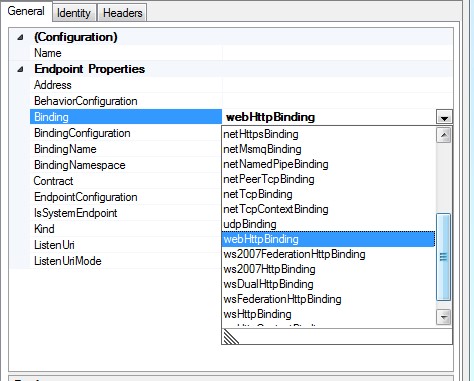
- Click on the Binding.
- Select “webHttpBinding” opion from the list.
Step 11:
- Name your End Point Configuration.
2. Click on your Behavior Configuration in the same area.
3. There is nothing. So, let’s configure it.
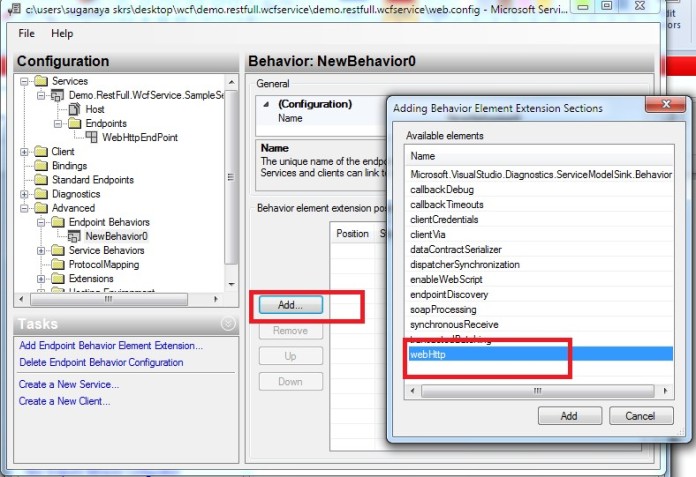
4. Click and Expand the Advanced Node.
5. Right Click on the “Endpoint Behaviors” node under the advanced.
6. Click on the Endpoint Behavior Configuration.
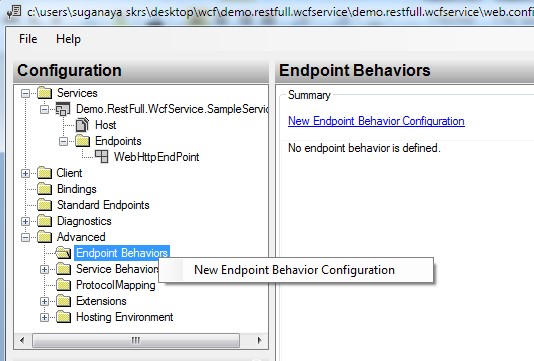
7. Click on the “Add” button.
8. You will get popup window opened. And click on the “webHttp” option. Refer the below screen cut.
9. Click on add. And Rename your behavior.
10. Now you have created the Behavior.
Step 12:
1. Go back to your Endpoint Config under service node you have created previously.
2. Click on the Behavior Configuration.
3. Select the Behavior as an option (It’s created by you).
Step 13:
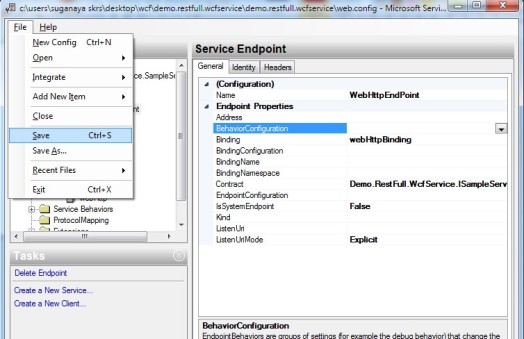
Now you have success fully configured everything. So,
- Go to File and save the Configuration.
2. Click on the File Menu again and choose “Exit” option.
Step 14:
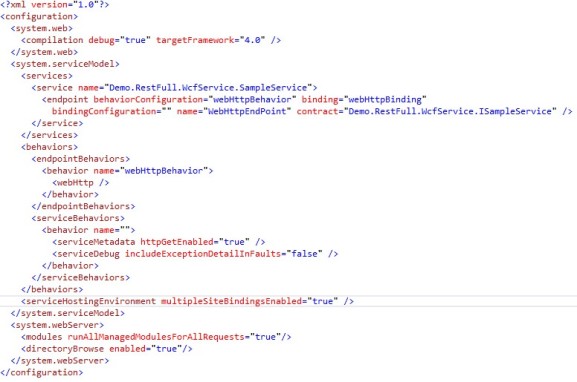
- Go to your Solution explorer.
- Click on the web Config. Your Config file should be look like below.
3. Build your solution once again.
4. Run your Project.
Step 15:
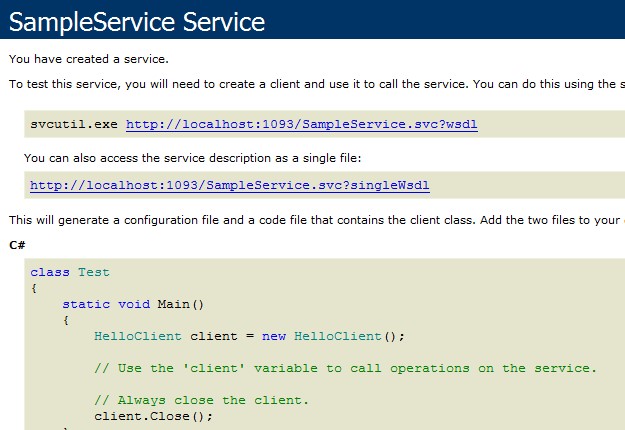
Your browser open ups the window. Click on the SampleService.svc
Step 16:
Yes our created service is running.
Now we need to check our method is returning proper values or not?
If you remember we have defined our Web Invoke stuffs in ISampleService,
[WebInvoke(Method = “GET”, ResponseFormat = WebMessageFormat.Xml, UriTemplate = “XML/{name}”)]
So, we have defined our Uri Template. We need to follow the same.
Note: Port Number can be varying. So just change port number according to yours
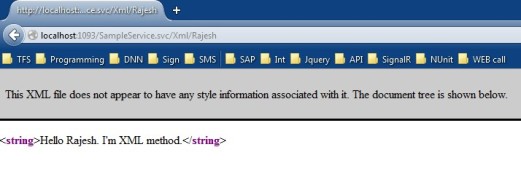
- To call the SayHelloXml method refer below URl.
http://localhost:1093/SampleService.svc/Xml/Rajesh – Change the port number
Look at my try 1:
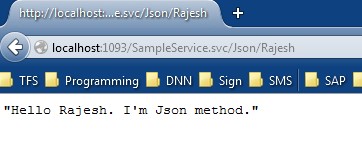
2. To Call the SayHelloJson method refer below URI
http://localhost:1093/SampleService.svc/Json/Rajesh – Change the port number
Look at my try 2:
Ohhhhhfffff….. Ow Man… That’s it you have configured WCF REST Service successfully.
Conclusion:
Writing WCF configuration stuffs quite tuff and if you make any silly mistake, finding the error will give you the Headache. So just use the tool to configure the service and endpoints. It will be easy and smart.
The End
